Create a project
You create a project with Create New Project above the project list. The project belongs to the organization you are working in. Depending on your role, the button may not be shown; ask an Owner of your organization.
-
Click Create New Project. The NEW PROJECT dialog opens.
-
Enter the Project name. It is shown in the project list and in the app bar while the project is open.
-
Check the slug in URL, the short name of the project in its organization. ANALYZE Web App derives it from the name: lowercase letters and digits, with the other characters replaced by underscores, so "Wiper Motor Controller" becomes
wiper_motor_controller. You can change it.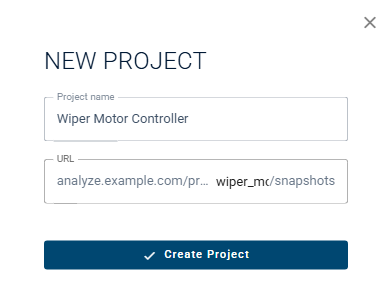
-
Click Create Project.
ANALYZE Web App confirms that the project was created and lists it in the project list. To give other people access, see Share a project.
A new project is empty. When you open it, it opens on Snapshot Management, and Dashboards and Data Explorer become available once the project has its first snapshot. How snapshots reach the project is described in Where new snapshots come from.
When the slug is not accepted
The slug must be unique in the organization, between 5 and 256 characters long, may only contain lowercase letters, numbers, hyphens and underscores, and must start and end with a letter or a number. Below URL, ANALYZE Web App says what is wrong:
- "This slug already exists. Please enter another one."
- "The length of the slug has to be between 5 and 256."
- "Slug must only contain lowercase letters, numbers, hyphens or underscores and shall not start or end with a space or underscore."
Correct the slug before you click Create Project.