DISCLAIMER: This example only work with UNIX based systems due to the nature of Eclipse console
C++ Code Generation
This example demonstrates how to generate C++ code from a statechart. We will use a simple light switch example and focus on the generator model.
Generator Model
In order to generate code we need to specify which code generator to use and into which folder to generate. For this, we need to create a so-called generator model. To do so,
- Select the models folder in the Project Explorer
- Right-click and choose New -> Code generator model
- Follow the wizard to select the C++ code generator and the state machine for which you want to generate C++ code
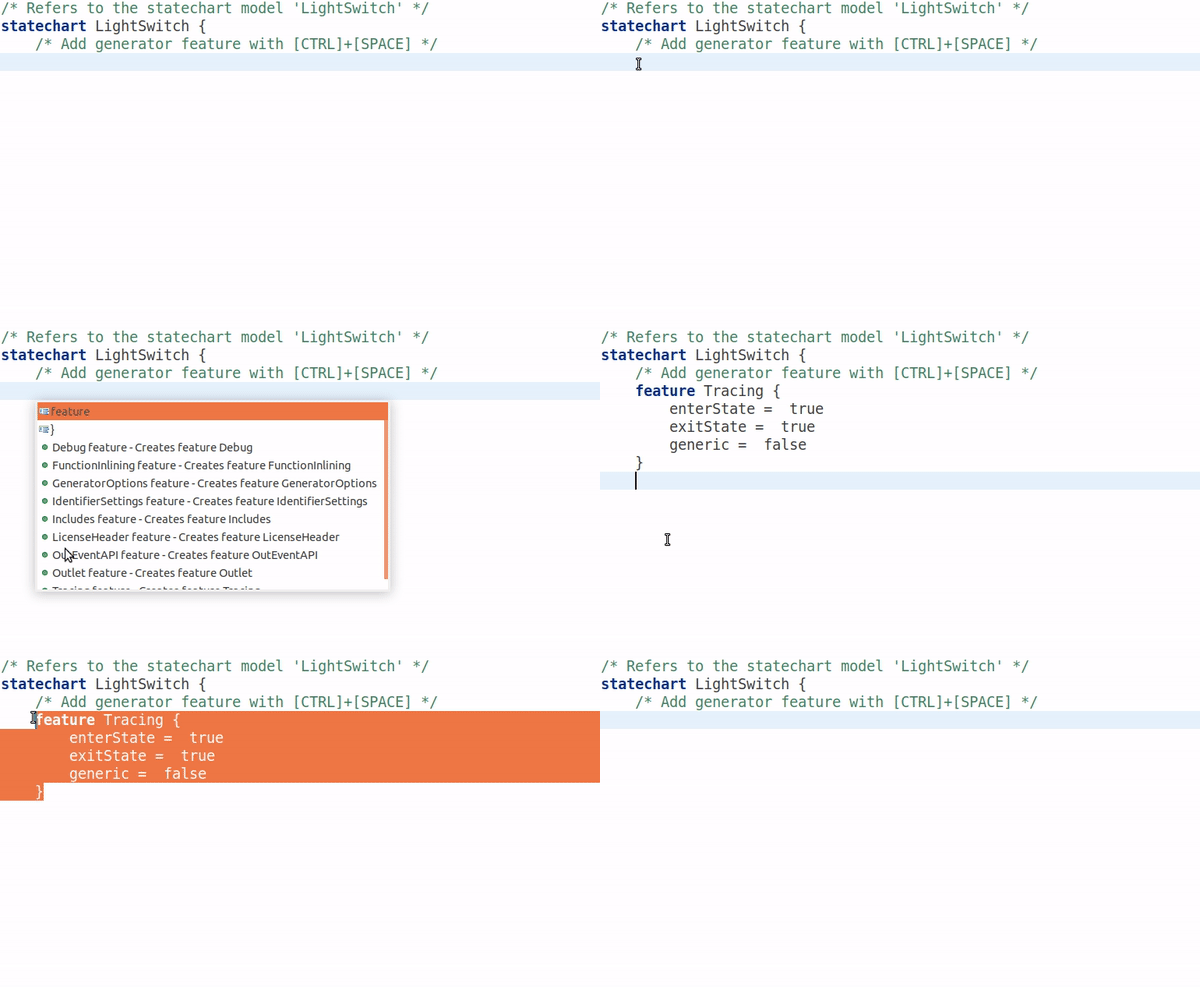
The new generator model will look similar to this one:
/* Defines which code generator to use */
GeneratorModel for create::c {
	/* Refers to the statechart model 'LightSwitch' */
	statechart LightSwitch {
		/* Specify the target location for the generated artifacts. */
		feature Outlet {
			targetProject = "itemis.create.examples.codegen.c"
			targetFolder = "src-gen"
		}
		/* Generate a default timer service implementation */
		feature GeneralFeatures {
			timerService = true
		}
	}
}
The generator model defines where the code should be generated into, and enables the generation of a default timer service. Besides setting up the target location, the generator model allows you to adjust several aspects of the generated code like naming, license comments or function inlining. Press [CTRL]+[SPACE] to get a list of available features. For more information, please refer to our documentation.
Invoking Code Generation
Code generation is usually invoked each time the statechart model is saved. This behavior can be disabled by unchecking the option Project -> Build Automatically. You can always manually invoke the code generation with Generate Code Artifacts in the context menu of the generator model.
The Example Application
As an example application we will use the light switch example with brightness adjustment from the Basic Tutorial.
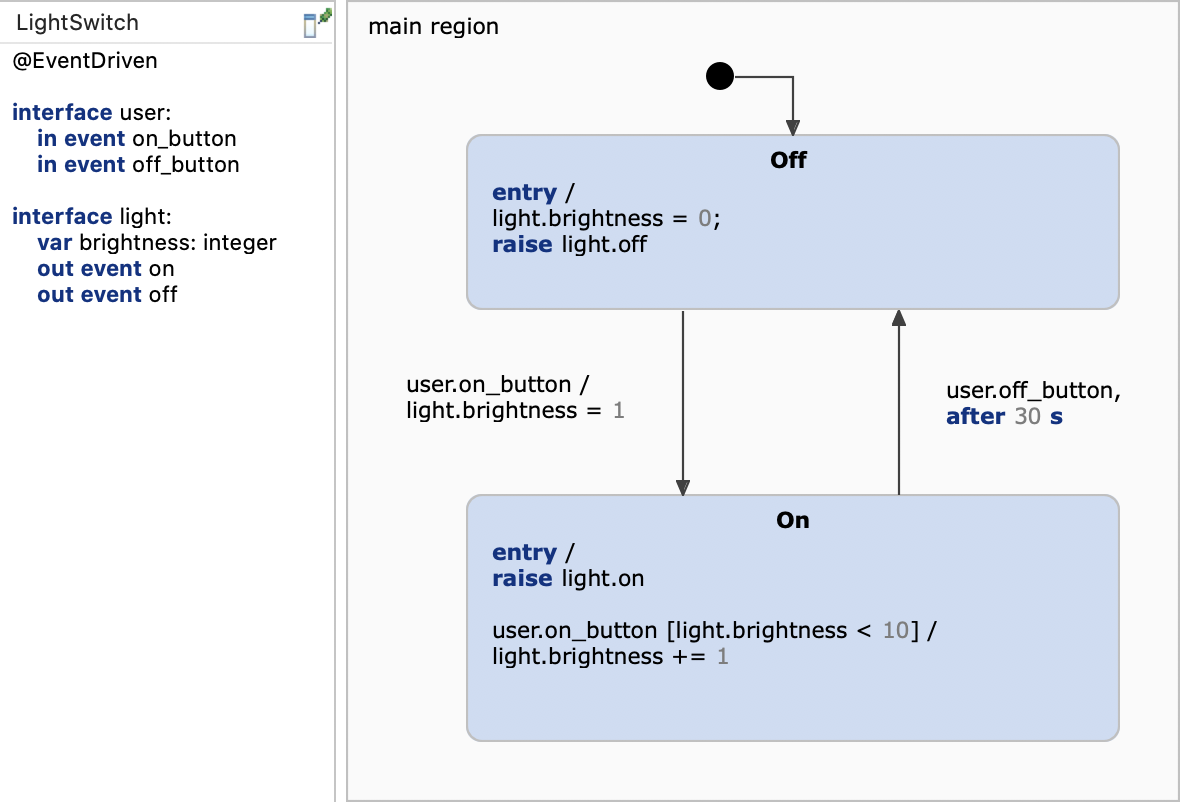
Our application is a simple interactive console with which the user can switch the light on or off. The complete application code is implemented in main.cpp:
#include <iostream>
#include <stdio.h>
#include <stdlib.h>
#include <fcntl.h>
#include <unistd.h>
#include <time.h>
#include <sys/time.h>

#include "../src-gen/LightSwitch.h"
#include "../src-gen/sc_rxcpp.h"
#include "../src-gen/sc_timer_service.h"

using namespace std;
using namespace sc::timer;

/* ! As we make use of time triggers (after & every)
 * we make use of a generic timer implementation
 * and need a defined number of timers. */
#define MAX_TIMERS 10

//! We allocate the desired array of timer tasks.
TimerTask tasks[MAX_TIMERS];

//! The timer tasks are managed by a timer service. */
TimerService *timerService = new TimerService(tasks, MAX_TIMERS);

// Start point of the execution.
unsigned long time_offset = 0;

// Last execution time.
unsigned long last_time = 0;

// Current time.
unsigned long current_time = 0;

// Stores the time to sleep.
struct timespec sleep_time;

static char buf[20];

/*! Observer with callback for the light.on event */
class LightOnObserver: public sc::rx::SingleSubscriptionObserver<void> {
	virtual void next() {
		cout << "Light is on." << endl;
	}
};

/*! Observer with callback for the light.off event */
class LightOffObserver: public sc::rx::SingleSubscriptionObserver<void> {
	virtual void next() {
		cout << "Light is off." << endl;
	}
};

unsigned long get_ms() {
	struct timeval tv;
	unsigned long ms;
	gettimeofday(&tv, 0);
	ms = tv.tv_sec * 1000 + (tv.tv_usec / 1000);
	return ms;
}

int main(int argc, char **argv) {
	/*! Instantiates the state machine */
	LightSwitch *lightSwitch = new LightSwitch();

	/*! Sets the timer service */
	lightSwitch->setTimerService(timerService);

	/*! Subscribes observers to the state machine's observables */
	LightOnObserver *lightOnObserver = new LightOnObserver();
	LightOffObserver *lightOffObserver = new LightOffObserver();
	lightOnObserver->subscribe(lightSwitch->light()->getOn());
	lightOffObserver->subscribe(lightSwitch->light()->getOff());

	/*! Enters the state machine; from this point on the state machine is ready to react on incoming event */
	lightSwitch->enter();

	/*! Ensures non-blocking read() call. */
	//fcntl(STDIN_FILENO, F_SETFL, fcntl(0, F_GETFL) | O_NONBLOCK);
	cout << "Type 1 or 0 to switch the light on or off." << endl;
	sleep_time.tv_sec = 0;
	sleep_time.tv_nsec = 100;
	time_offset = get_ms();
	while (1) {
		current_time = get_ms() - time_offset;
		timerService->proceed(current_time - last_time);
		int numRead = read(STDIN_FILENO, buf, 1);
		if (numRead > 0) {
			char input = buf[0];
			if (input == '1') {
				/*! Raises the On event in the state machine which causes the corresponding transition to be taken */
				lightSwitch->user()->raiseOn_button();
			} else if (input == '0') {
				/*! Raises the Off event in the state machine */
				lightSwitch->user()->raiseOff_button();
			}
			if (input != '\n') {
				/*! Prints the value of the brightness variable */
				cout << "Brightness: "
						<< lightSwitch->light()->getBrightness() << "." << endl;
			}
		}
		last_time = current_time;
		nanosleep(&sleep_time, 0);
	}
}
The most important parts are commented in the main.cpp file. These are the bullet points:
- Instantiate the state machine and the observers
- Set the timer service
- Subscribe observers to react on outgoing events
- Enter the state machine; from this point on the state machine is ready to react on incoming event
- Raise the input events
user.on_buttonanduser.off_button
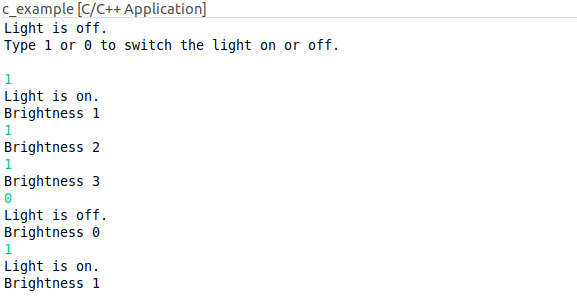
You can run the application with Run As -> Local C/C++ Application on the project. A console should open and ask you for input like in the screenshot below.
Get this example
The complete project — statechart models, sources and build files — lives in the itemis CREATE examples repository. Inside itemis CREATE for Eclipse you can import it directly with the example wizard.