Traffic Light (C++) for Arduino
Based on the standard traffic light example, this project shows how to use a statechart to develop software for the Arduino platform.
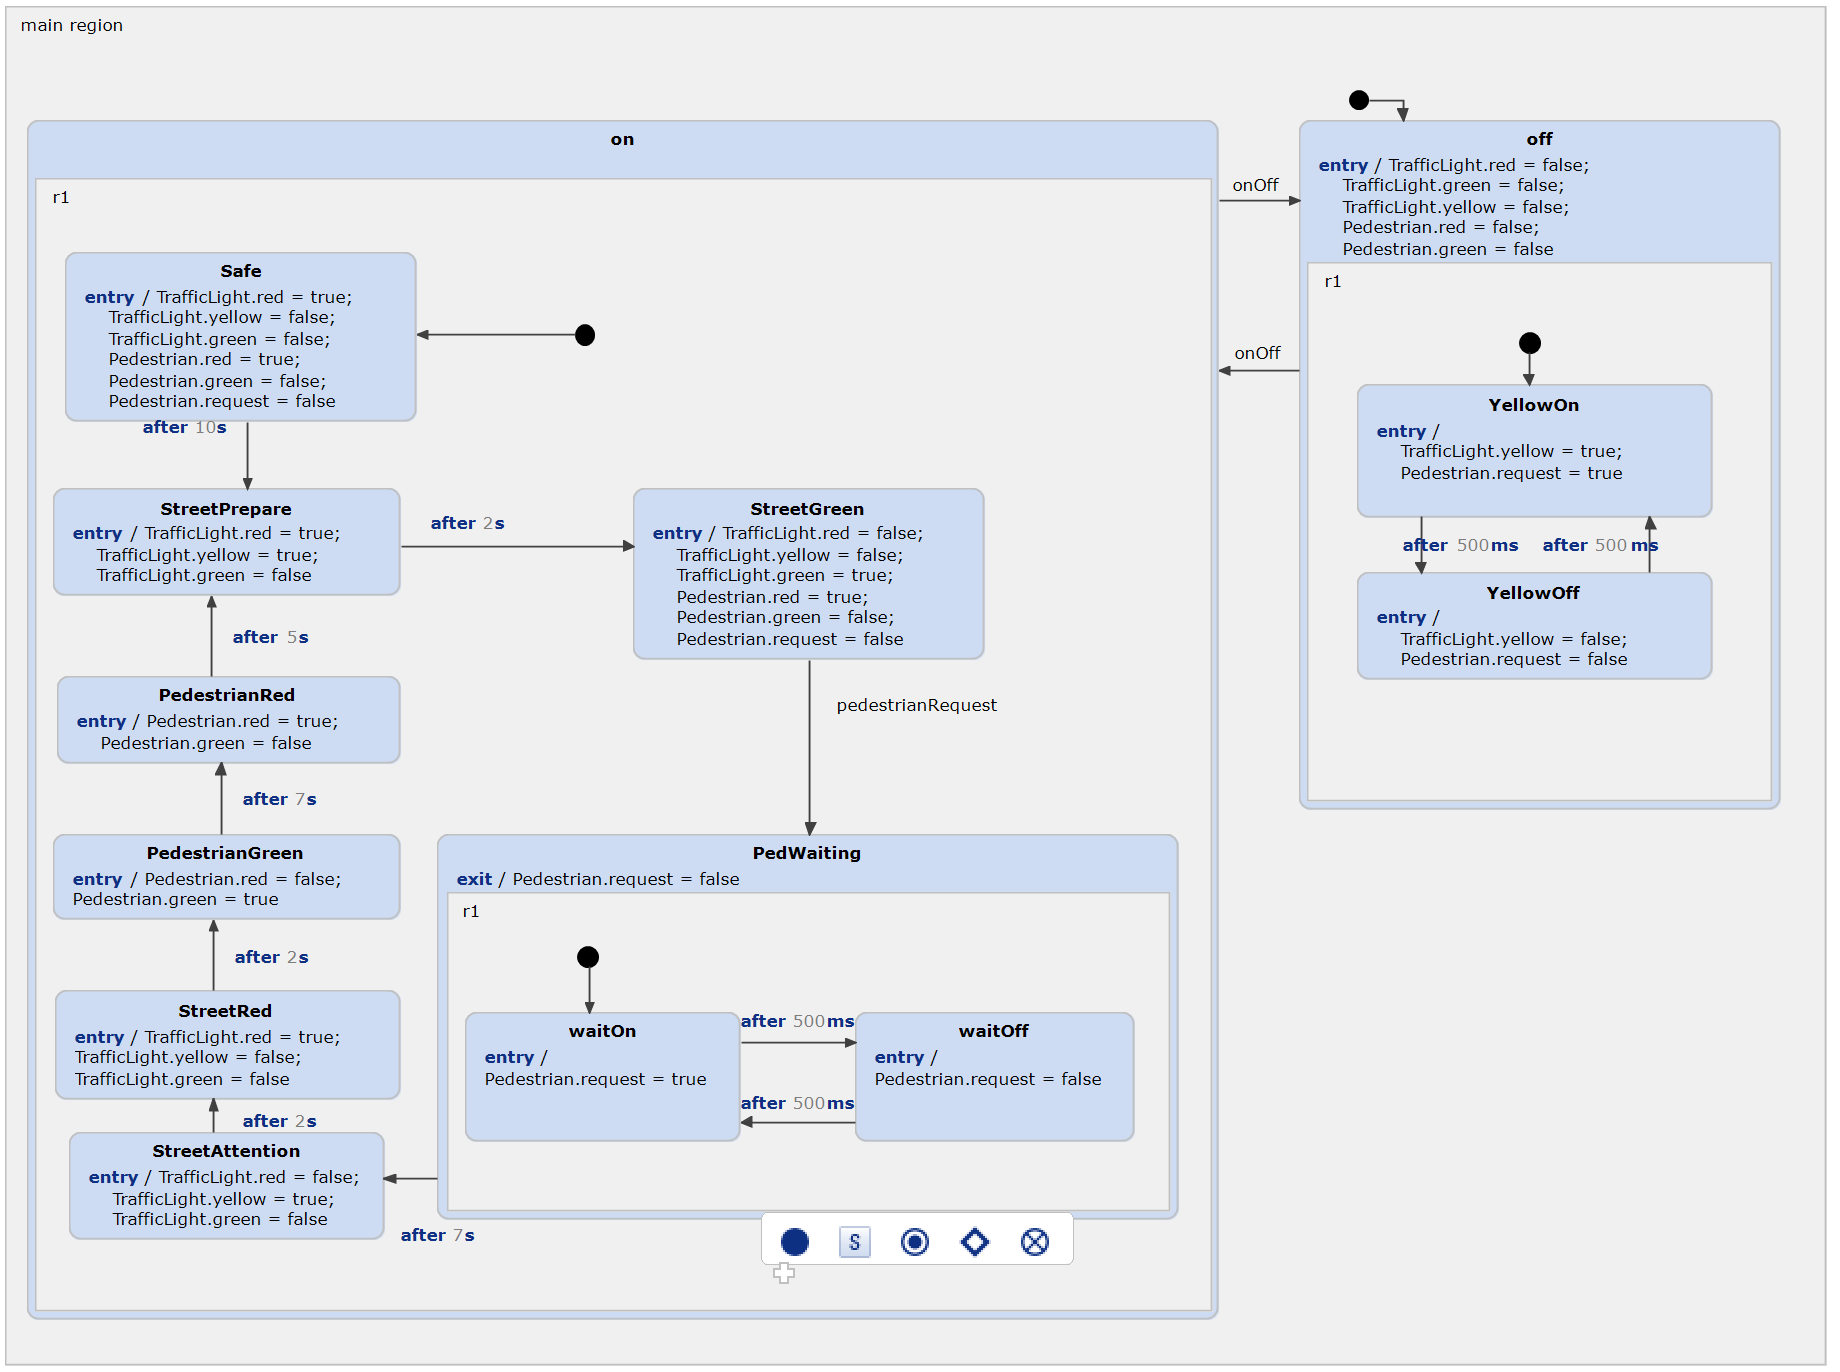
More information about the statechart itself can be found in the standard traffic light example, which should be considered first. In summary, we have two traffic lights: one for the traffic on the street, and one for pedestrians who want to cross the street. They can push a button to request their traffic light to turn green, which activates a blinking wait-light first. The street's traffic light then goes through the standard procedure, turning on the yellow light, followed by the red light, allowing the pedestrians to cross safely. After some time, the pedestrians' traffic light turns red again, and the cars are allowed to pass until the next request is made by a pedestrian.
Additionally, the traffic light can be switched off completely. This turns the yellow lights into a blinking mode, signaling that the traffic light is indeed switched off and that the street should be crossed in a careful manner.
Running the example on the Hardware
This video shows how the state machine runs on the example:
Building the Hardware
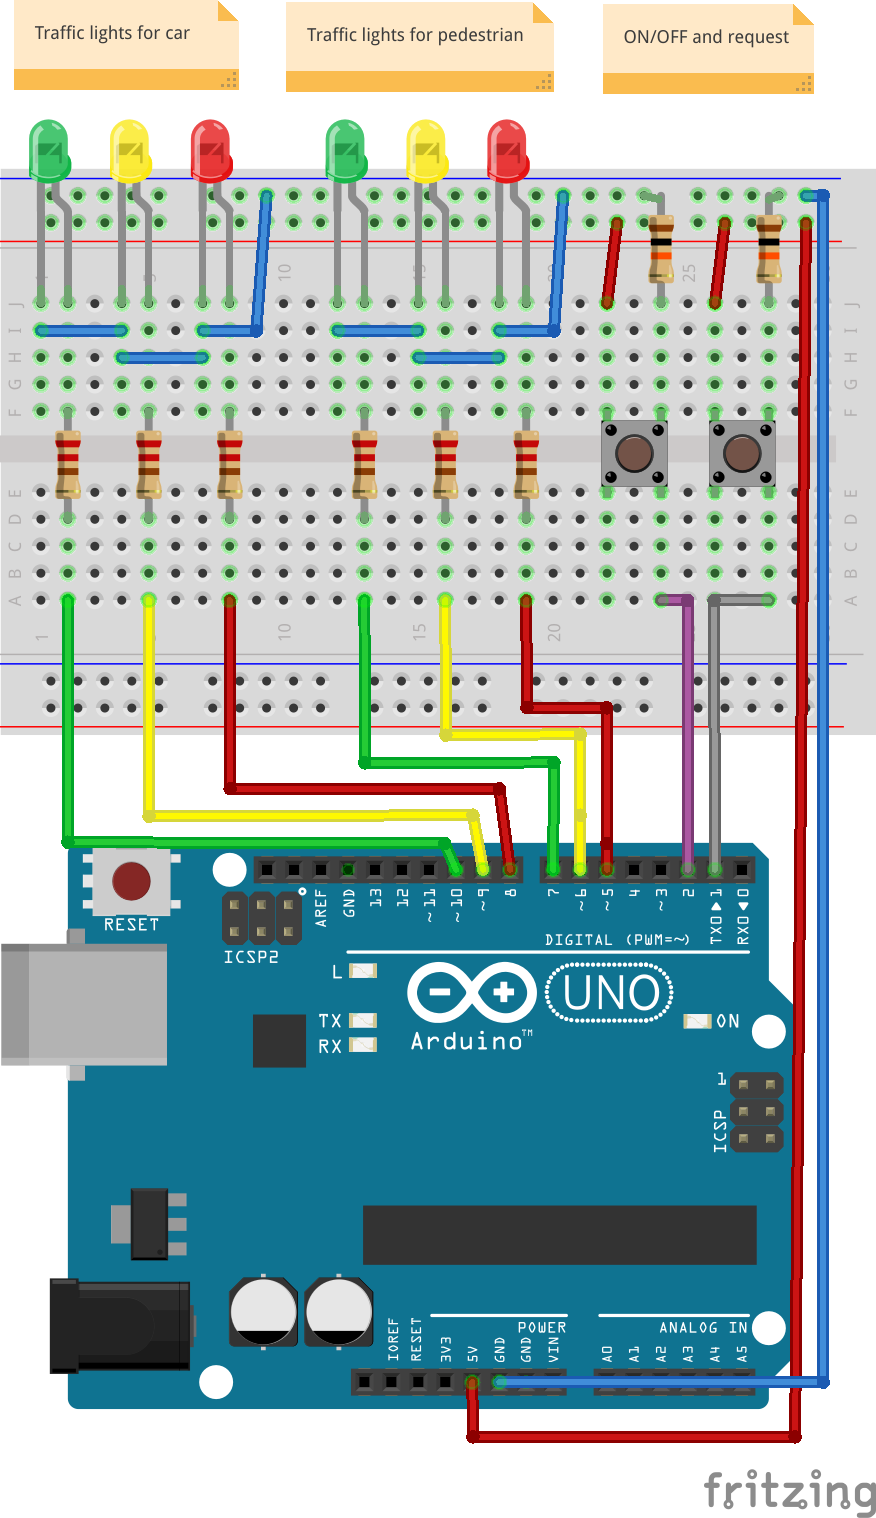
The correct pins can be found in the arduinoPins.h file.
Get your parts ready! You will need:
- 2 push buttons
- 6 LEDs, ideally:
- 2x red
- 2x green
- 1x yellow
- 1x white
- 8 resistors:
- 2x 10kR or similar
- 6x 220R or similar
Of course, you can change the pins, but since this represents the pin numbers in the software, don't forget to change them as well.
Addons for compiling and flashing
All Arduino examples can be compiled via command line or be imported into the Arduino IDE. An easier way is using the Sloeber plugin , which allows you to compile and upload the code directly in Statechart Tools.
How to install the Sloeber plugin
There are two ways of how to install the plugin. The easiest way is using our example wizard, which allows you installing required plugins. Just follow the built-in instructions.
Another way is installing the plugin manually. You need to follow these steps:
- Click on 'Help' -> 'Install New Software..' -> 'Add...'.
- Define a name and add 'http://eclipse.baeyens.it/update/V4/stable' as location.
- Choose the plugin - not the IDE.
- Follow the instructions
- The installation dialog will ask you for a restart. After this restart is done, the installition it will download some files. Just wait until it's finished
Configure the Sloeber plugin
After the installation you should notice a new Toolbar, which allows you to compile and flash your Arduino. Initially, the projects are not configured, as you may require to add the toolchain:
- Click on Window -> Preferences
- Open the Arduino window -> Platforms and Boards
- Depending on your Arduino, choose the board. For the UNO click on arduino -> Arduino AVR -> check out one toolchain
- Click on Apply and Close and wait until the downlaod has been finished
Configure the example
Once you have installed the toolchain for your Arduino, you can configure the project.- Right click the project and open the Preference page
- Open the Arduino window
- Choose your platform and port
Compile and upload
Finally, you can use the green toolbar for compiling and flashing the Arduino. Have fun!