Working with model snapshots Copy link to clipboard
To better understand the results of your validation, it is sometimes useful to compare the current artifacts and links with an older version of your traceability model. To support this use case, itemis ANALYZE can create a model snapshot of your current trace model, which can later be loaded and explored. A model snapshot includes:
- the configuration file that was active when the snapshot was created,
- the traceability model, including
- all artifacts (linked as well as unlinked ones),
- all links, without the versions of the linked artifacts.
The blog post "Snapshots and change reports for requirements traceability data" contains a brief overview of model snapshots and what their use is.
Creating a model snapshot Copy link to clipboard
To create a model snapshot, proceed as follows:
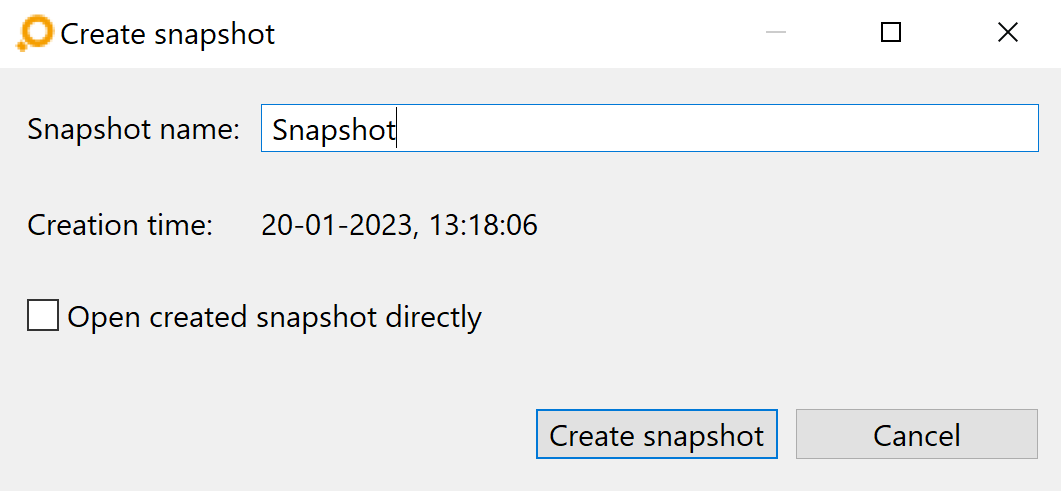
- In the main menu, select ANALYZE → Snapshot → Create snapshot.
- Enter a name for the new snapshot.
- The chosen name must be a valid folder name, because it will be used as the name of the folder the snapshot is stored in. Therefore, you need to choose distinct names for different snapshots.
- If you type the name of an existing snapshot, a confirmation dialog will ask you whether you really want to replace the existing snapshot by a new one.
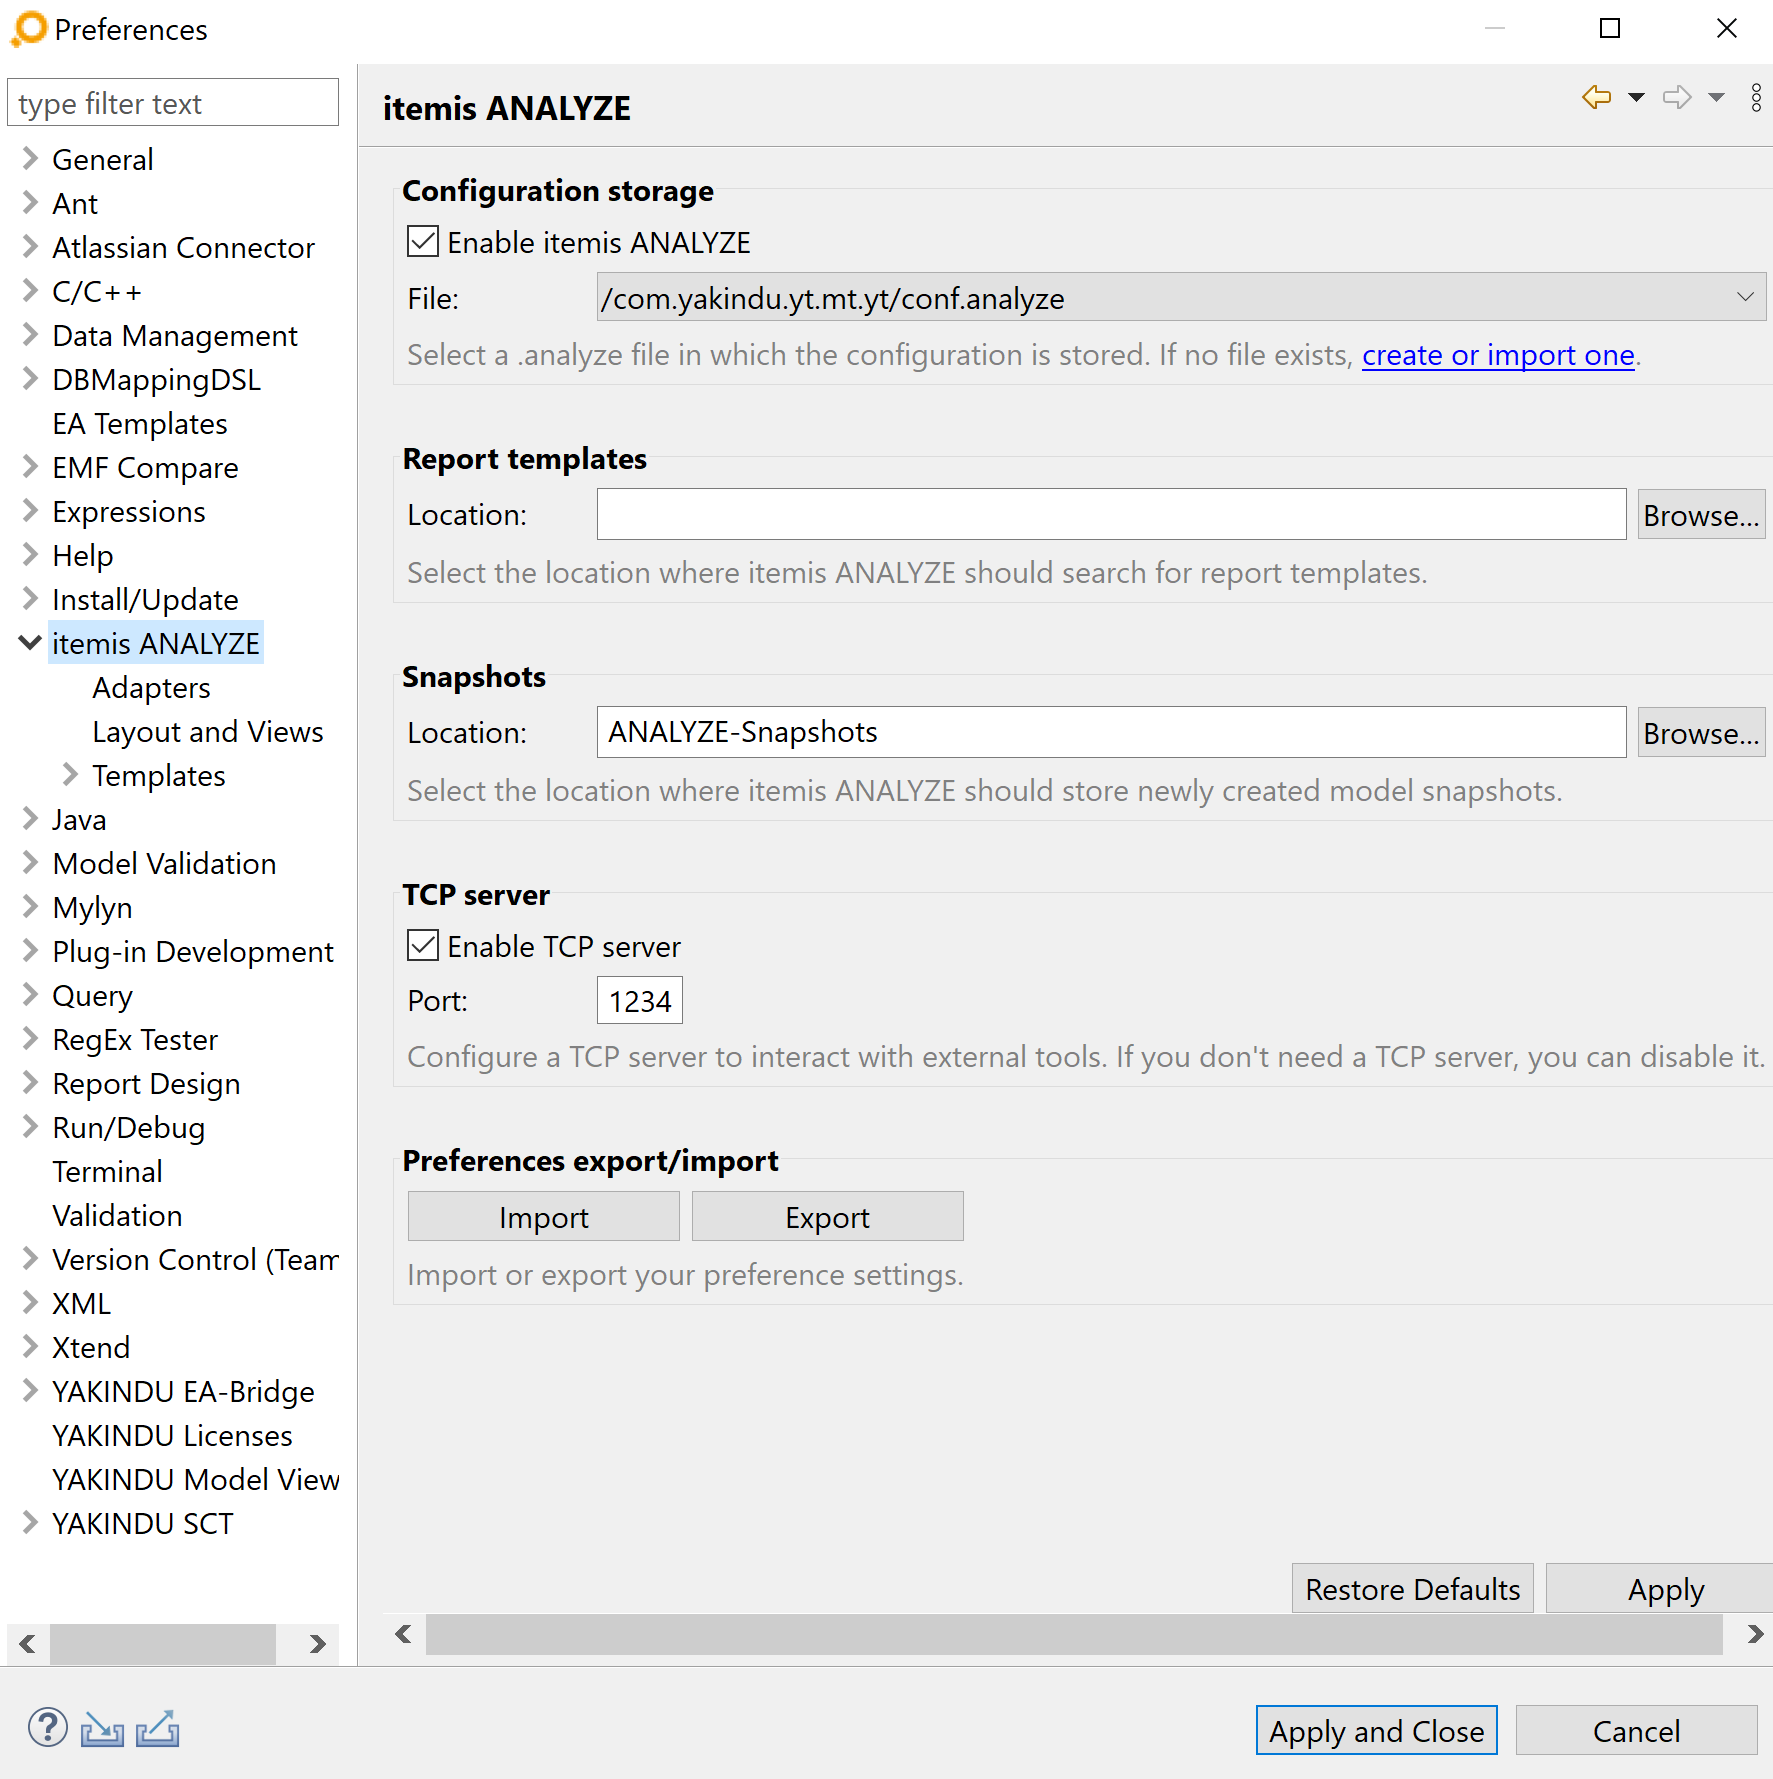
After a few seconds – or minutes, depending on the size of your model – the snapshot folder will be created in the folder specified in your preferences. By default, it will be stored in the ANALYZE-Snapshots project. The location can be configured in the itemis ANALYZE preference page, under „Snapshots location”.
Loading a model snapshot Copy link to clipboard
To load a model snapshot, select ANALYZE → Snapshot → Load and manage snapshots from the main menu bar, then double-click or select the snapshot you want to load, and click on the Load snapshot button. By default, the most recent snapshot is selected.
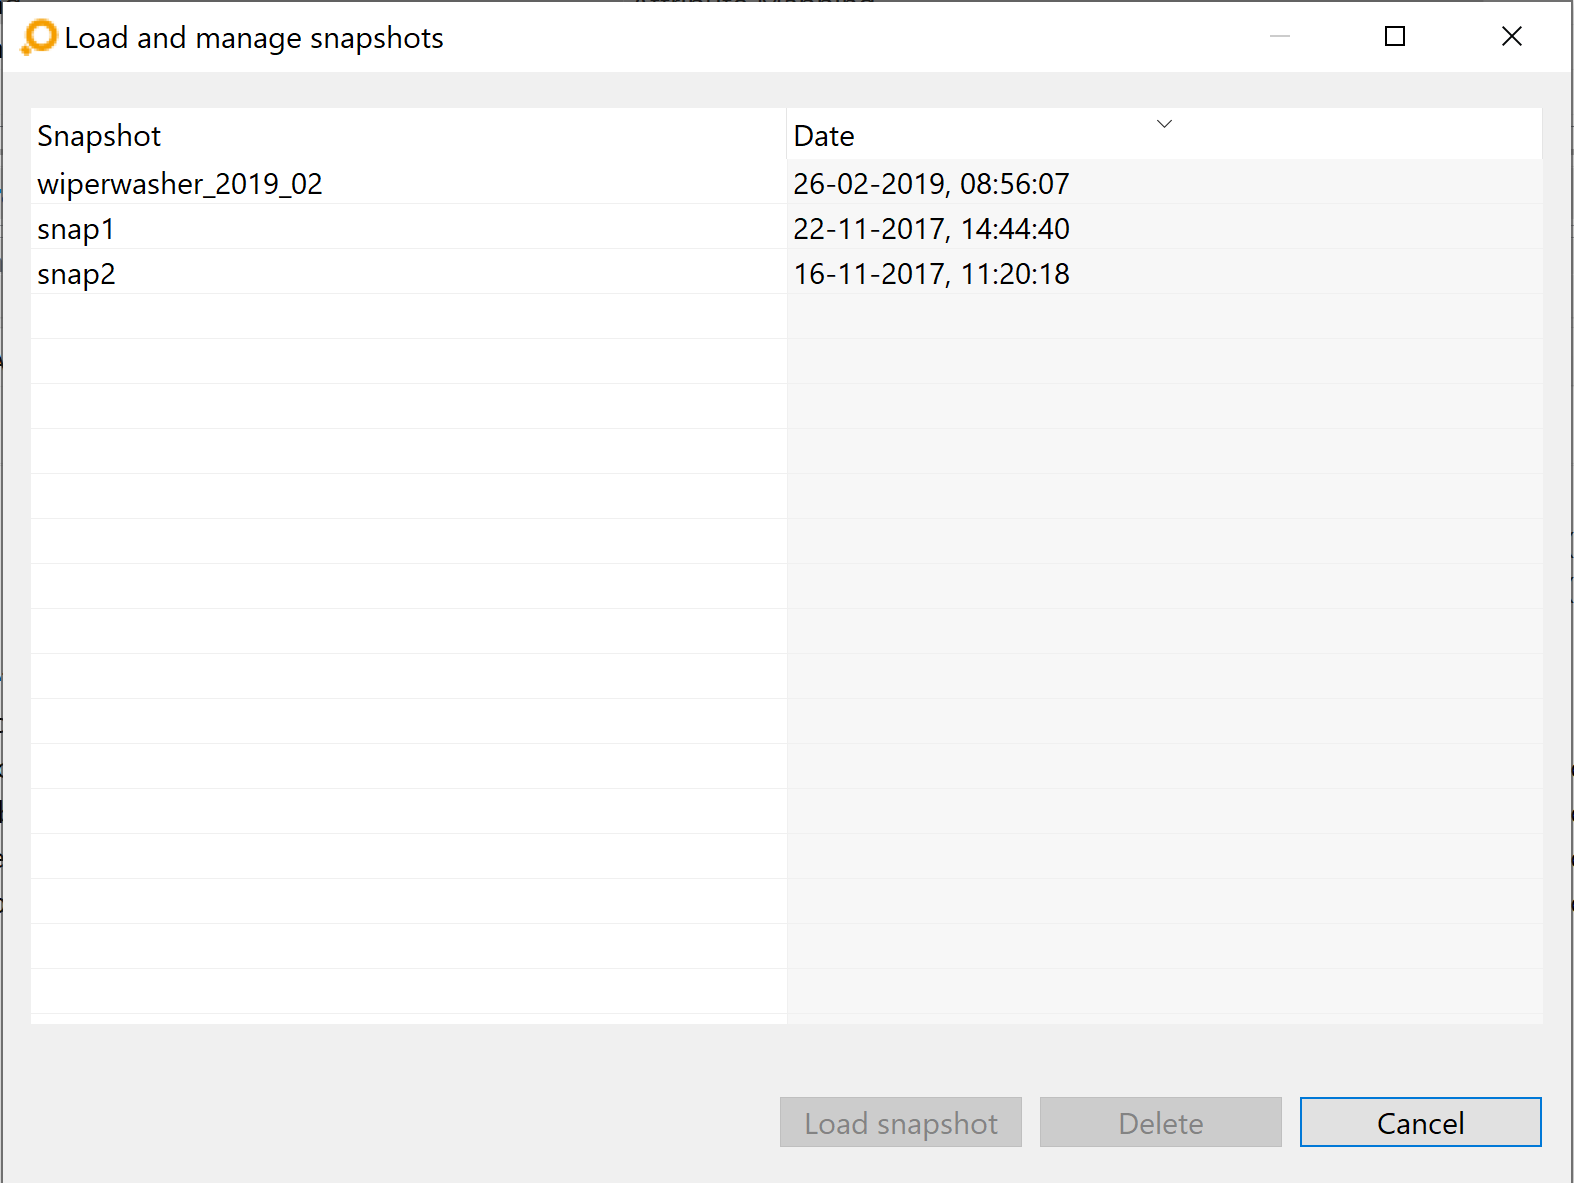
Using the same dialog, you can also delete snapshots, see section "Deleting a model snapshot".
Loading an external model snapshot Copy link to clipboard
On Windows, you can use ANALYZE to view any model snapshot file – without the need to set up or select a workspace. Such a snapshot that is not related to a workspace is called an external model snapshot. When opening an external snapshot, ANALYZE uses a temporary workspace behind the scenes.
To open an external snapshot, drag the corresponding .analyzesnapshot file in the Windows explorer onto the ANALYZE_Snapshot_Viewer.bat file, which resides in the ANALYZE installation directory besides the ANALYZE.exe executable.
Exploring a model snapshot Copy link to clipboard
Once a model snapshot is loaded, it mostly behaves like a standard itemis ANALYZE configuration, although in read-only mode. The main difference is that data is retrieved from the snapshot, not via enabled adapters. This means that in order to browse a snapshot you do not need any tool or adapter to be installed.
The following views, features, and perspectives are supported in snapshot mode in the same way as they are in conventional mode:
- ANALYZE Explorer
- ANALYZE Overview
- Search Dialog
- ANALYZE Analysis (including queries, query results, and the ANALYZE Dashboard)
- ANALYZE Favorite
- ANALYZE Selection History
- Report creation
- Configuration editor (read-only)
Since the model snapshot is read-only and shows potentially outdated data which may not exist in your current documents or code, the following features are disabled:
- ANALYZE Editor (except for the search dialog)
- All editing menus in the ANALYZE Explorer (delete/edit link)
- Validation

Snapshot mode
Limitations Copy link to clipboard
Adapter-related features may or may not work. As the model snapshot mode does not manipulate any source data directly, information required for navigation from/to external tools may not be available. For example, if you create a snapshot for a model containing a Word document and then delete this document, you can still load the snapshot and find the artifacts. However, you won’t be able to navigate to the original document.
In another scenario, the original document has been changed since taking the model snapshot. Navigating from the snapshot to the document will show the latter in its current state, however, which might be very different from its state at the time the snapshot was created.
Since model snapshots do not directly rely on adapters, you can load a snapshot containing artifacts for which you don’t have the proper adapters installed. This will work, though with some limitations: The adapter icon will be missing and navigation will be entirely disabled.
Deleting a model snapshot Copy link to clipboard
To delete a model snapshot, select
ANALYZE → Snapshot → Load and manage snapshots from the main menu, then select the snapshot(s) you want to delete, and press the
[Del] key or click on the delete button in the bottom right corner.
Alternatively, if the snapshot mode is active you can also delete model snapshot(s) in the
ANALYZE Snapshot List view via the
 icon or the
[Del] key.
You can also delete the model snapshot that you are currently exploring. However, you will need to acknowledge this in a confirmation dialog. Acknowledging the deletion will end the snapshot mode.
Snapshot bar and the ANALYZE snapshot list Copy link to clipboard
As long as you are in snapshot mode, the snapshot bar will be displayed. It allows for several functions:
- showing the name of the model snapshot currently being explored,
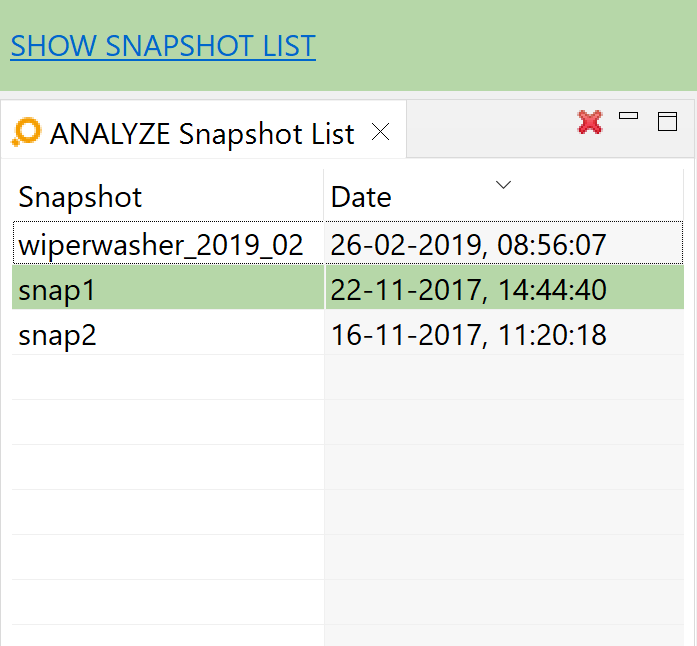
- allowing to show/hide the snapshot list view via the Show/Hide snapshot list link,
- allowing to create a delta report via the Create delta report button, see section Reporting model snapshot differences,
- allowing to end the snapshot mode via the End snapshot mode button,
- adding external snapshots (files with the .analyzesnapshot filename extension) via drag and drop to the snapshot list.
The snapshot bar is automatically opened when loading a model snapshot, and it is automatically closed when ending the snapshot mode. The ANALYZE snapshot list contains all available model snapshots, allowing quick navigation by simply double-clicking on a snapshot to load it as well as deleting snapshots via the
[Del] key or the
icon. External snapshots dropped into the list can be activated in the same way. On deletion of such snapshots, only the link is removed from the list while the snapshot file itself is left untouched. External snapshots are not kept in the list after closing ANALYZE.
Please note: By default, snapshot bar and snapshot list are opened on the top and on the left of the screen, respectively, in the ANALYZE perspectives, see figure "Snapshot mode". If you can’t see them when in snapshot mode, you can reset the perspective via Window → Perspective → Reset Perspective….

Reporting model snapshot differences Copy link to clipboard
Having two trace models conserved as model snapshots, it is possible to create a report that contains the differences between the two snapshots. This delta report lists removed or added artifacts and links as well as changed custom attributes in existing ones. The wizard to create a delta report is available
- from the snapshot bar,
- via the main menu as ANALYZE → Snapshot → Create delta report, or
- via the context menu in snapshot list.
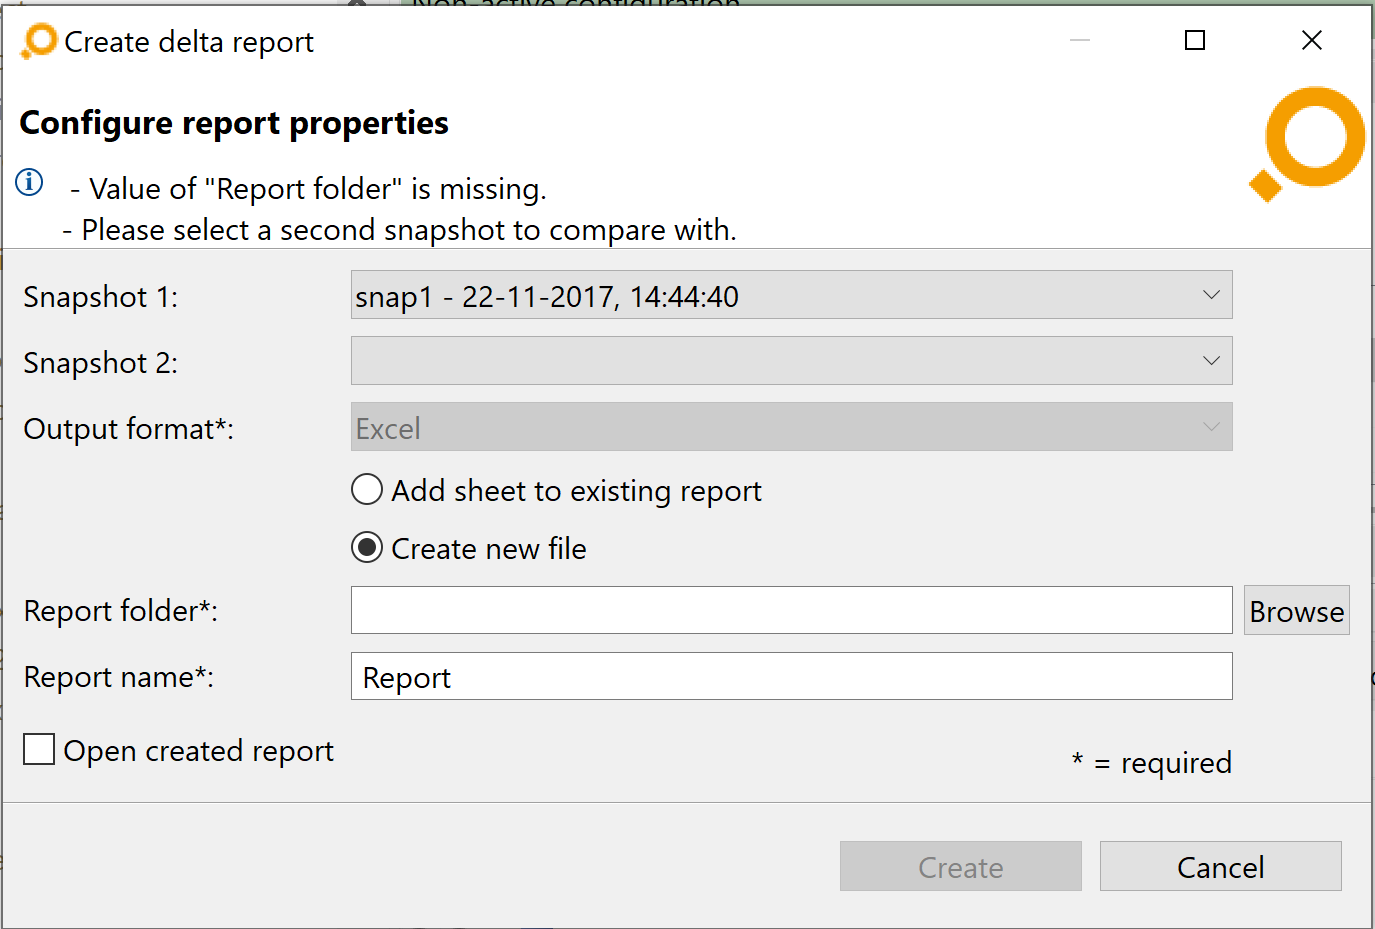
In the dialog, select the two model snapshots that you want to compare. Similar to other report dialogs, please also select an output folder and a filename for the report.
Uploading a model snapshot to itemis Analyze Copy link to clipboard
It is possible to upload a model snapshot to itemis ANALYZE user account. The wizard to upload the model snapshot is available
- via the main menu as ANALYZE → Snapshot → Upload Snapshot
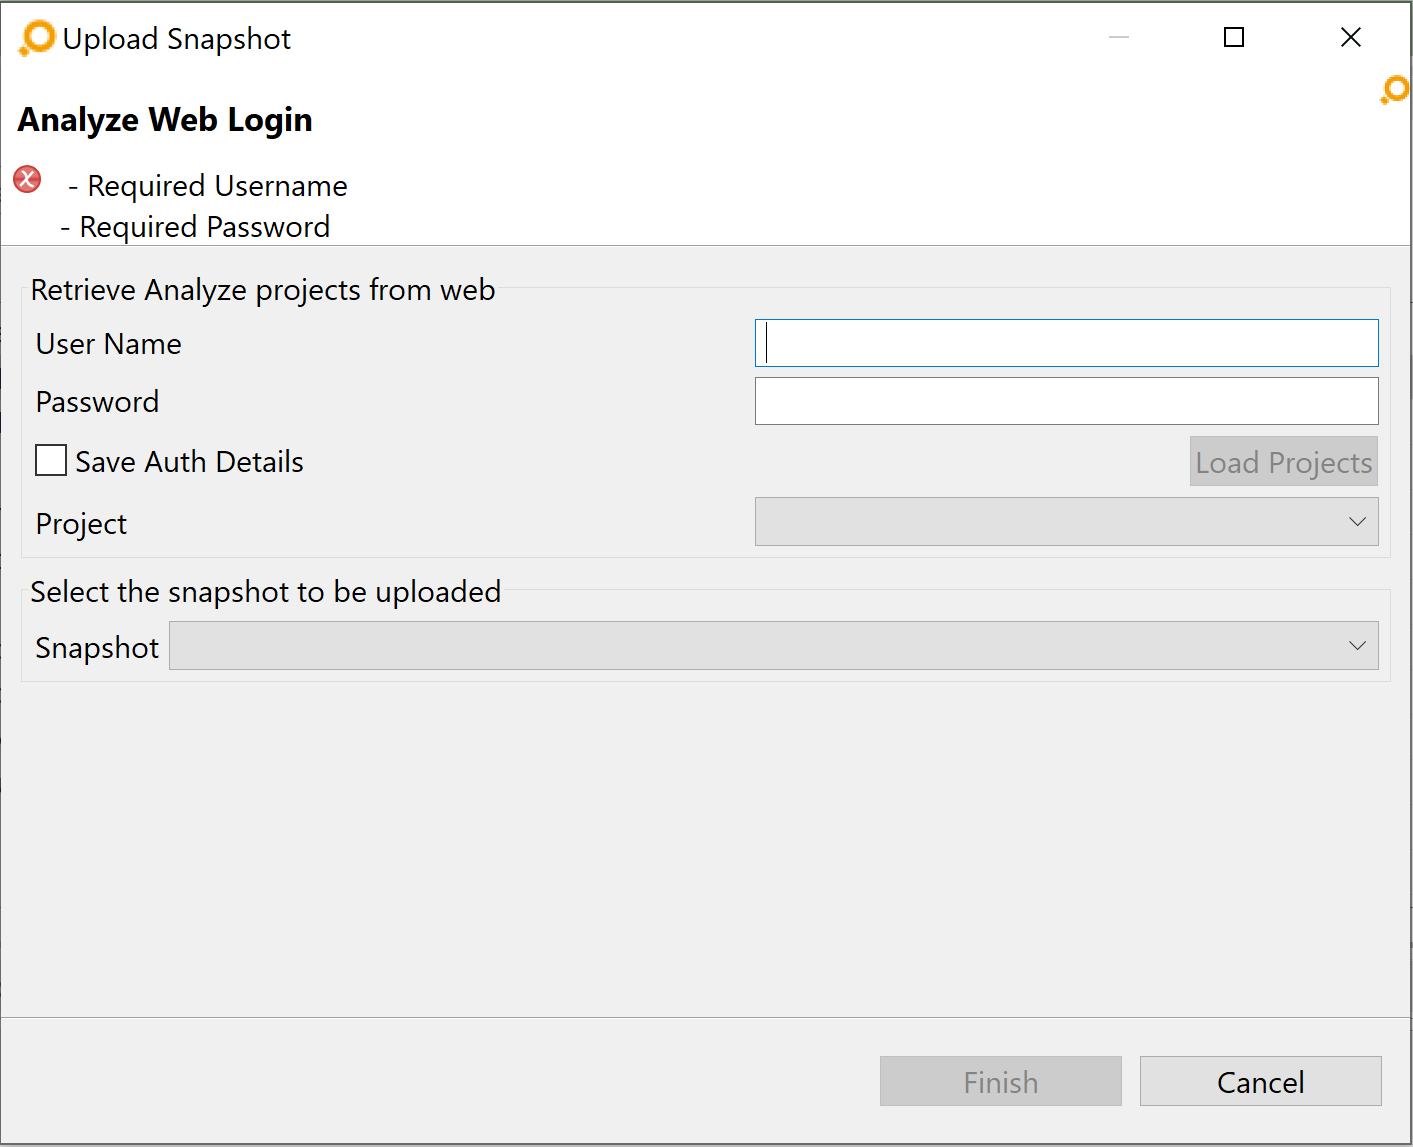
In the dialog, provide the credentials to the itemis ANALYZE user account then press Load Projects button to retrieve all the projects available in the account. Once the projects are populated then select the project where the snapshot has to be uploaded from the drop down menu. Select the snapshot to be uploaded from the drop down menu. Then click on Finish button to start upload.
A pop up dialog appears providing confirmation of successful upload or Failed upload with an error message.