Table of contents
Setting up your itemis ANALYZE workspace Copy link to clipboard
To start working with ANALYZE, it is necessary to apply a ANALYZE license and to apply the initial ANALYZE configuration.
For a better understanding of these steps we will give you some general setup instructions in the following, including:
- Introducing important platform concepts
- Recommendations how to set up your workspace
- Resources for further reading
Eclipse platform concepts Copy link to clipboard
ANALYZE is based on the Eclipse platform and inherits its concepts. The most important of them are briefly explained below.
The workbench Copy link to clipboard
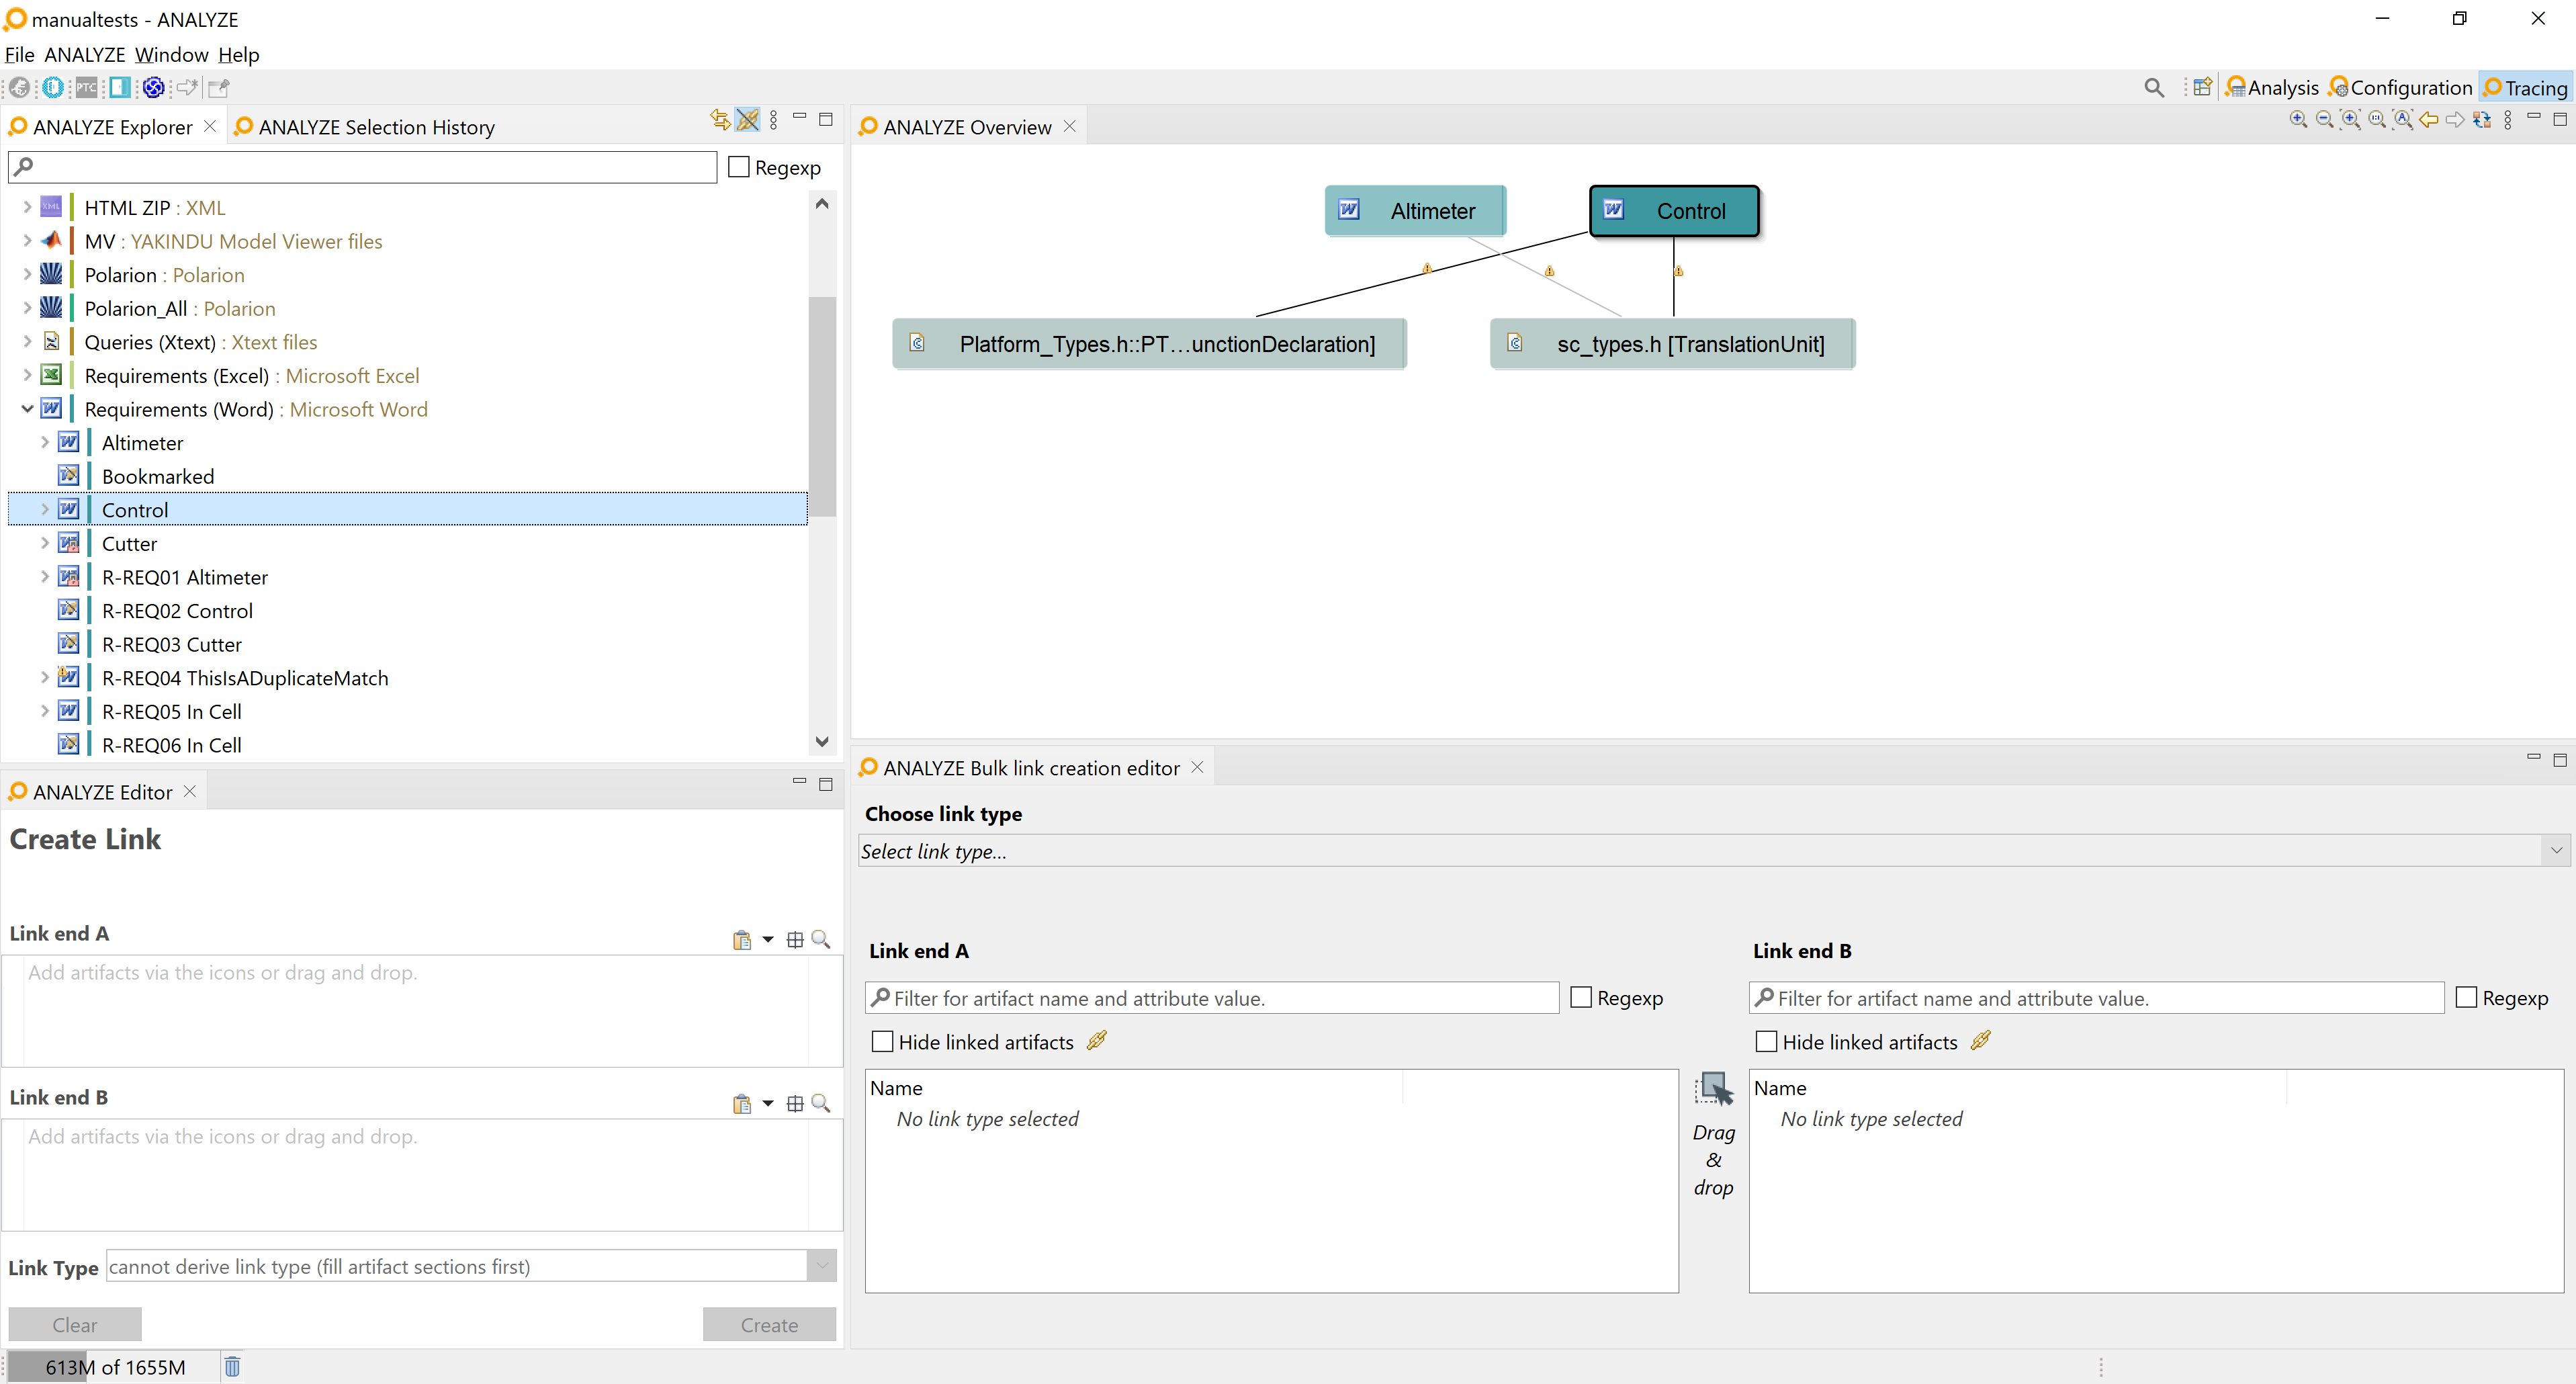
The Eclipse workbench is your desktop working environment, i.e., ANALYZE’s main window and its contents. The workbench typically consists of one editor and a number of views and editors. Take, for example, figure "The ANALYZE workbench": This workbench is divided into four different parts. Starting at the top left, there is the ANALYZE Explorer view, together with the ANALYZE Selection History on another tab. At the top right, there is the ANALYZE Overview. Below it, there is the ANALYZE Bulk link creation editor. Last but not least, you will see the ANALYZE Editor at the bottom left.
You can rearrange and resize editors and views as you like, and you can also open further views and close those you don’t need. A certain arrangement of views and editors is called a perspective. ANALYZE comes with a few pre-defined perspectives. However, you can create and save your own perspectives or even overwrite the pre-defined ones. To save a perspective, select Window → Perspective → Save Perspective As.
Detailed information on the Eclipse workbench, targeted especially to software developers, is available in the Eclipse "Workbench User Guide". Alternatively, select Help → Open Help in the main menu to open the Eclipse Help window. You will find the „Workbench User Guide” in the navigation menu on the left-hand side.

The ANALYZE workbench
Projects Copy link to clipboard
An Eclipse project groups resources that are belonging together logically and are being processed as a whole. All resources inside your workbench must reside in projects. Projects can have a type, e.g., C sources are in a C project, and requirements may reside in a resource project. Your workbench layout regarding resource management – how many projects you have and which resources they contain – is your own decision.
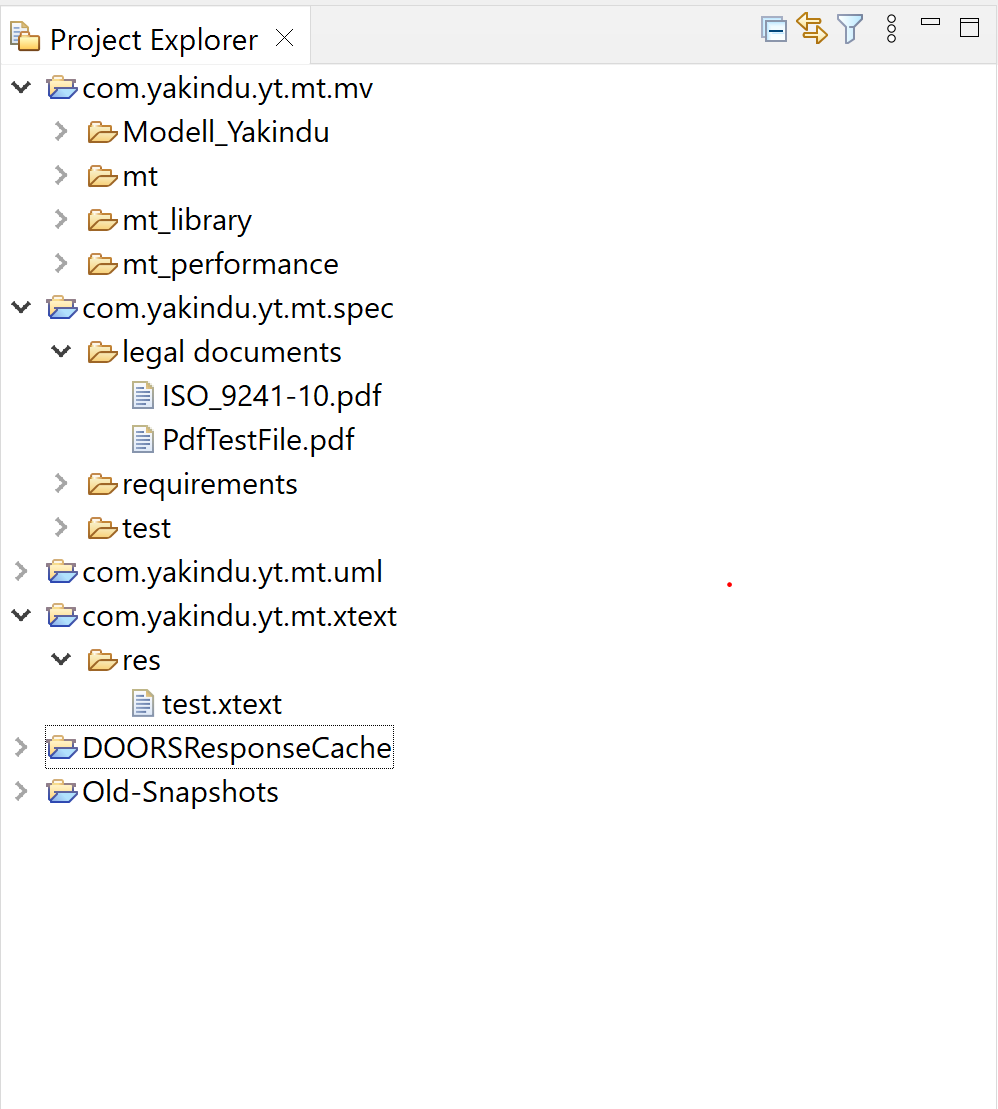
Project configurations are held in .project files. In the default project layout, there’s a .project file in the project’s top-level folder. All files and directories in that folder are belonging to the project. However, you can also link folders from elsewhere into a project. Figure "The project explorer" shows a sample project structure in the project explorer view.
Please note: The Eclipse term project is somewhat misleading. A real-world project typically consists of not only one, but several Eclipse projects. You may want to think of your Eclipse workspace (see below) as your real-world ANALYZE project definition and of each Eclipse project as a single module or resource.

The project explorer
The workspace Copy link to clipboard
The Eclipse workspace aims to manage all the files relevant to your work, e.g., files that contain development artifacts like requirements, source code, and test cases. Physically, these files may be located anywhere, say, in various locations on your hard disk or on several shared drives. Artifacts like requirements that are managed by Subversion and source code maintained in a Git repository may be checked out into several folders on your hard disk. Files are organized virtually in projects (see above) , and the workspace bundles all your projects under one hood. That is, you can browse and navigate between projects and the files contained therein as if they would reside next to each other.
Technically, the workspace is a directory on your disk. It contains project subfolders and the .metadata directory. The latter contains everything needed to describe your workbench setup, e.g., the projects that you are working with, preference settings, and the layout of views and editors. Projects do not necessarily reside in the workspace folder; they can be located anywhere on your disk.
You can have multiple workspaces, but only one workspace can be opened at a time.
Recommendations Copy link to clipboard
- Separate your ANALYZE resources (i.e., configuration and data) from your development artifacts (e.g., the files containing your requirements). Best practice is to create one dedicated project containing both ANALYZE configuration and data (e.g., the stored trace links), and to put your development artifacts into other projects.
- The layout of your workbench regarding resources (e.g., how many or which projects) should best reflect your daily work process. All files relevant for one role should be in the same project.
Within the file system, separate your projects from your workspace. As the workspace not only stores projects, but also the user’s preferences, you might not want to put the workspace into your revision control system. Depending on whether you have common company guidelines regarding the file structure on your disk, it might be a good idea to share your project definitions by putting the .project files under revision control.
If starting with a naked workspace, you may either want to import existing ANALYZE Traceabilty projects into your workspace or create a new project on your disk. In case you set up a new project without existing config.analyze and data.analyze files, ANALYZE will create them as soon as you specify a project location. The path to the config.analyze file can be set via the preference page. The path of the data file can be configured while creating a native file data access. If not already created, folders for both files will be created, too.
Further reading Copy link to clipboard
Refer to the basic tutorial of the Eclipse platform documentation for a detailed description of how to manage the workbench, how to create or import existing projects, and much more.